Plumbers Repair Single-Lever Kitchen Faucets in About an Hour

Plumbers Bradenton install, maintain, and repair the pipes that carry water and waste to and from homes and businesses. This technical career requires strong attention to detail and the ability to solve problems quickly and effectively.

Plumbers

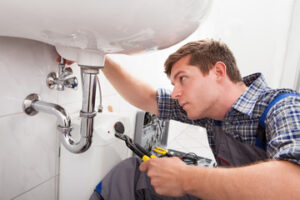
Plumbers also work on construction sites, interpreting blueprints and plans to lay out piping systems and connect fixtures and appliances. They often work evenings and weekends to respond to emergency calls.

One of the most common plumbing repairs is for dripping faucets. Leaking faucets can not only waste water and money, but they also contribute to moisture damage in your home. Fortunately, repairing a dripping faucet isn’t as difficult as it seems. With a little know-how and some replacement parts, you can tackle most leaky single-lever kitchen or bathroom faucets in about an hour.

If the leaking is around the handle or spout, start by turning off the water supply valve under the sink. Then remove the handles with a screwdriver and pry off any decorative caps to expose the Allen screw that holds the handle(s) on. Twist the screw counterclockwise to release the handle(s) and pull them off. Now you can access the spout assembly. Using a flathead screwdriver, pop the cap off the top of the faucet to reveal the screws that need to be removed with a hex key or wrench. If you have cartridge stems, loosen the retaining nuts and pull out the stems. Now you can access the O-rings under the handles that need replacing. Replace the O-rings, making sure to coat them with nontoxic plumber’s grease, and reassemble the faucet.

Leaks in the spout are typically caused by worn O-rings, which can be replaced with a kit that’s available at most hardware or home improvement stores. A plumbing supply specialist may have the best selection of replacement O-rings for a particular faucet type, and they’re more likely to have a wrench to help you tighten the new rings.

Another common source of leaks in the spout is the ceramic disc valve that controls the flow of water. This type of valve is sturdy and reliable, but if the disk is worn or the seat is pitted, you’ll need to replace it with a new one. To do this, take the old one to a home center or plumbing supply store to match it with an identical replacement.

Other common leaks are caused by worn washers that rest against the valve seat and cause friction over time, leading to wear and eventually a leak. These can be replaced by a simple washer, which you’ll find in a kit at most hardware or home improvement stores.

Cartridge Replacement

Cartridges are like the spark plug of a car engine: They last for years but eventually need replacing. Cartridges come in various shapes and sizes, but they all work the same way: a quarter-turn movement opens or turns off the water. The cartridge must be compatible with the faucet handle—the number of splines or grooves on the stem must match the number in the handle.

The first step in replacing a cartridge is to remove the decorative ring (sometimes called a cap) that covers the control lever and set it aside. Next, loosen the cartridge retaining ring that holds the cartridge in the body of the faucet. Some are easy to remove with pliers, but others require a special cartridge puller available at hardware stores or home centers.

Ball Replacement

Plumbers install, maintain, and repair the pipes and fixtures that deliver water, waste, and heat to residential, commercial, and industrial buildings. Their work ensures that occupants have clean, freshwater to drink, that waste is properly conveyed away from living spaces, and that heating systems distribute heat effectively.

Plumbing is a trade that requires extensive training and certification to practice. Plumbers must be familiar with a wide range of tools and systems, from basic hand tools to advanced power equipment. They must also be able to understand and follow complex building codes and regulations. Plumbers often specialize in a particular area of the field, such as sanitation, drainage, or gas systems.

Most plumbers gain their skills through a formal apprenticeship. This option allows apprentices to learn from experienced professionals while earning a steady income. Others attend vocational school to complete a certificate program in plumbing or another related trade. Some plumbers choose to become independent contractors, which gives them more control over their schedule and choice of projects.

New construction projects provide a unique opportunity for plumbers to work on large-scale plumbing systems. On these jobs, they may be responsible for laying out plumbing infrastructure according to blueprints and architectural plans. This can involve installing piping, setting toilets, and connecting appliances such as dishwashers or washing machines. Construction sites also require plumbers to collaborate with other construction tradespeople, including carpenters and electricians.

Plumbers must have strong critical thinking skills to identify and resolve problems. They must be able to weigh different options and find solutions that are both efficient and cost-effective. They also must have excellent customer service skills, as they often interact with clients to explain their services and costs.

Because plumbers are often on their feet for long periods of time and need to lift heavy objects, they must have physical strength and stamina. In addition, they may be exposed to dangerous chemicals and sewage, so they must take proper safety precautions. Becoming a plumber can be a rewarding career, but it takes a lot of dedication and commitment to learn the necessary skills.

Concrete Repair – What You Need to Know

Concrete Repair involves filling and sealing cracks in concrete to stop water flow, reduce snagging, and prevent further damage to the concrete surface. The most effective concrete repair restoration techniques include epoxy and urethane injections.

Concrete Repair

Other techniques involve levelling uneven concrete surfaces through slab jacking and repairing major structural damage. Major damage could be physical (such as impact or abrasion) or chemical (degradation by carbonation and chlorides). To learn more, visit https://www.bakersfieldconcretecontractorservices.com.

Concrete cracks can be repaired with a wide range of products. It’s important to understand the underlying problem and choose the right repair method.

Routing and sealing is a common approach to repairing isolated, fine cracks in concrete surfaces. It involves enlarging the crack to form a V-shaped groove, then filling the groove with a flexible sealant. This method is most effective on concrete with low permeability, but may not be suitable for very porous concrete. This type of repair is not a substitute for structural repairs.

Before attempting this type of repair, you should thoroughly clean the cracks to remove any dust, debris and loosened asphalt concrete. This process can be done with high pressure air blasting or wire brushing and is recommended to reduce adhesion failures in the cracked surface. This process will also make the cracks more manageable when applying a sealant.

When using a routing and sealing method, the cracks should be filled in a way that will prevent moisture intrusion and promote long-term stability. This can be accomplished by using a flexible crack filler that will stretch and shrink with the concrete as it moves.

It is recommended to use a material that will resist oil, salt and grease in order to prolong the life of the concrete crack repair. Many products are available that will effectively block these chemicals from penetrating the concrete.

This type of repair is typically used in conjunction with other methods for larger structural cracks or to address water leaks. Injection is an efficient repair method for dormant or active cracks and can be used on concrete structures such as water treatment facilities, parking garages and bridges.

When using this method, it is imperative that the injection system be properly designed by a professional engineer experienced in concrete construction. This is because these structures must be built strong enough to support the design loads, durable against the forces of weathering and economical in terms of first cost and ultimate service life.

The injected materials can be epoxy, urethane or polymer mortars. When injecting concrete, it is important to only fill in the cracks that are structurally sound and not to create new cracks. This is because if new cracks form, they will accelerate the instability that caused the original crack to form.

Drilling and Plugging

When concrete surface cracks show up on a property owner’s home or commercial business, it’s time to make some repairs. Whether the cracks are cosmetic or structural in nature, our experts at Eden Construction Inc can recommend the best method to repair them. First, we’ll figure out what caused them to begin with and then do the necessary preparation to ensure that the repair is made with a material that will solve the problem once and for all.

One of the most popular methods to repair small cracks is to use a patch kit or concrete overlay material. This material bonds to the existing concrete and fills in the missing chunks of concrete, thus eliminating trip hazards that can result from uneven surfaces. The good news is that this type of repair material is relatively inexpensive, quick and easy to apply and can last a long time as long as the surface is maintained properly.

Another very effective way to repair concrete is to use the stitching method. This technique involves drilling holes along the surface of a concrete crack, then stitching them together using a metal wire. This process provides tensile strength to the various sections of the crack and helps to prevent water leakage through them.

Stitching is a costly option and is usually reserved for structures that are subject to a lot of foot or vehicular traffic. However, it is often the most cost-effective solution to structural cracking.

Another important factor in choosing the right repair method is to know what your expectations are for the repair. It is very common for crack repair materials to fail, so it’s essential to find a concrete repair material that has a reputation for lasting. Some manufacturers provide excellent technical support and training for their products so you can be sure that you’re getting the most from your investment. You can also purchase repair guides, such as Concrete Repair Manual, published by the International Concrete Repair Institute (ICRI), which includes references from ACI, ICRI, the U.S. Army Corps of Engineers, The Concrete Society (British), the BRE (also British), and many others.

Stitching

Concrete surface damage can occur due to a number of factors. Weathering is one of the biggest reasons, but heavy foot and vehicle traffic, structural settling, and ground movement can also lead to deterioration. It’s important to address any cracks or spalling in a timely manner, as these issues will only get worse over time.

The best way to deal with surface damage is by routing and sealing. This is an effective method for both large and small cracks, and can be done using a wide range of fillers like silicones, epoxies, or urethanes. This is an ideal solution for exterior concrete surfaces, as it prevents water and other contaminants from entering the crack, protecting the structure from further damage.

Another popular repair method is concrete stitching. Stitching is an excellent option for larger concrete repairs, and can be used to repair cracks up to 6 inches in depth. This technique involves installing a series of metal “staples” or “stitches” into the damaged concrete, which are then filled with a concrete patch material. These patches can be of any thickness, but it’s important to choose a high-quality product that offers good adhesion and is resistant to harsh environments.

It’s also important to properly prep the repair site before beginning work. Mist the area and remove any standing water, as this can affect bonding. It’s also essential to use a concrete supply that has a good reputation for quality products.

Lastly, be sure to allow enough time for the concrete repair process. It can take anywhere from a few hours to several days, depending on the severity of the damage and the type of repair required. It’s essential to ensure that there is adequate time available for careful assessment, precise execution, and curing and drying processes if necessary.

It’s also important to note that concrete repair is a costly endeavor. Not only does it involve the use of expensive materials, but it also contributes to environmental damage by depleting natural resources and generating massive amounts of CO2 emissions and inert waste. Ideally, engineers should strive to develop concrete repair techniques that achieve specified performance levels while being eco-efficient and cost effective.

Repairing Large Cracks

If a crack is more than 1/2 inch wide or extends across the entire slab, it may be more serious and should be repaired with structural repair methods rather than surface coatings. These types of repairs will typically require the help of a professional engineer experienced in concrete construction.

A good place to start a concrete crack repair project is by cleaning out the area around the damaged area. This will ensure that any debris in the crack will not keep the patching material from adhering to the concrete. A pressure washer or detergent can be used to clean the area thoroughly and to remove any loose aggregate. This will also prepare the area for the application of a sealer or filler, as these products should be applied to a dry surface.

For larger cracks, it’s a good idea to undercut the crack before applying a concrete repair product. This will provide a wider surface for the patching compound to adhere to, and it will help to prevent the crack from reappearing once it’s dry.

Once the crack has been undercut and cleaned, a masonry crack filler can be applied to the damaged area. This should be done in 1/4-inch layers, and each layer should be allowed to dry completely before the next is applied. Once the last layer has been applied, a masonry trowel can be used to smooth and feather the edges into the surrounding concrete surface.

When choosing a concrete crack repair product, it is important to select one that has been formulated and tested for performance. A reputable company will offer a range of products that are suited to different types of damage, and they will be happy to assist you in selecting the best product for your concrete repair job. There are a number of environmental-friendly options available as well, which are perfect for projects where the environment is a priority. Taking the time to address small problems with concrete surfaces will prevent them from escalating into costly structural problems and maintenance costs in the future. So remember to assess the condition of your concrete surfaces regularly and to address any problems promptly.

Kitchen Remodeling – What You Need to Know

If your kitchen is outdated, you can make it look and function better with remodeling. This can increase your property value and improve your family’s quality of life.

Determine your budget and must-have features before meeting with contractors. Homeowners can get quotes from several contractors to compare rates and services. Some general contractors also offer design and architectural services. Contact Richmond VA Kitchen Remodeling now!

The amount you spend on kitchen remodeling depends on a number of factors. Labor costs consume the biggest chunk of your budget, and these vary by geographic region, so be sure to take local rates into account when setting a budget. Cabinets and appliances are next on the list, and they too can vary significantly in price. Avoid splurging on high-end designer appliances, such as Sub-Zero refrigerators and warming drawers, and opt instead for standard models that will still provide an attractive and functional addition to your home.

The scope of your kitchen remodel also affects the overall cost. Expanding the kitchen’s footprint, for example, requires demolition and may require moving plumbing and electrical fixtures to accommodate the new layout. This is a complex task that should be left to professionals who are familiar with building codes and the structural integrity of walls and ceilings. New plumbing and wiring adds considerably to the overall project costs, and it is often best to outsource this work to a professional contractor.

Flooring is another significant expense, and it typically accounts for about 7% of the total project cost. Laminate and vinyl are less expensive options, while tile and hardwood floors are usually more costly.

You should also factor in the cost of hiring a general contractor or interior designer to manage the project and oversee subcontractors. These services don’t come cheap, but they can save you a lot of time and money by helping you stay on target with your budget.

It is possible to remodel a kitchen on a tight budget. However, it will take more time and patience, and you will have to make compromises in the finish level of cabinets, appliances and other elements. A good rule of thumb is to spend no more than 6-10% of your home’s value on a kitchen renovation.

It’s also a good idea to decide at the outset whether you will hire a general contractor or design consultant to manage the kitchen remodel on your behalf. These professionals can help you get better rates on materials and other aspects of the project, but they will also add to your overall remodeling expenses.

Design

A kitchen remodel is a major project that can alter the layout, shape, and function of a space. If the changes are extensive, you may want to hire a general contractor. These are construction firms with a lot of expertise and specialization in kitchen remodeling. They usually work on a commission between 15-25%. They also offer various services, such as design, drafting, and management of workers.

The first step in any kitchen remodel is to decide the scope of your renovation. This will help you set a budget. For example, you may choose to replace cabinet doors or countertops. These projects are less expensive than a complete kitchen remodel. They can also increase the value of your home and make it more attractive to potential buyers.

To begin with, you should write down your goals and determine what changes you’d like to make to the kitchen. Some ideas for small kitchen remodels include replacing the cabinets with classic Shaker-style fronts, removing upper cabinetry to reveal open shelving, and revamping the backsplash. You can also use cork flooring instead of tile, quartz countertops, and stainless steel appliances for a more modern look.

Once you’ve determined your kitchen remodeling goals, start doing research. Visit showrooms to see what is available in your area and gather inspiration. Take note of the different brands and price points. You should also write down the items that are most important to you and rank them from highest to lowest priority. This will help you avoid spending money on a kitchen design that isn’t functional or aesthetically pleasing.

The next step is to create a design plan for your kitchen. This will involve choosing the materials, finishes, and color palette. You should consider the size, color, durability, cost, and maintenance of the materials and finish you choose. In addition, you should think about the layout and lighting of your kitchen. You can use different tools to develop a kitchen layout and design, such as kitchen software and 3D modeling programs.

Before beginning the kitchen remodeling project, it’s a good idea to ask for a permit from the local authority. This will ensure that the work is done according to standards and complies with zoning laws. The local authority will also check whether your kitchen upgrade is compatible with existing plumbing and electricity lines.

Materials

A kitchen remodel can require many decisions regarding cabinets, sinks, countertops and backsplashes, flooring, lighting, appliances, layout, colors & finishes, storage, and much more. When these options are considered early on in the process, it can help to keep costs down.

Choosing the right materials will help to determine how your kitchen remodeling project will turn out. Budget and style will play a huge role in this decision. There are a number of different options available for every price range. Fiberboard and plywood are common for less expensive cabinets, while solid wood cabinetry is a more expensive but durable option. Stone counter-tops are also a premium option, and can be very durable.

The amount of work that will be involved in a kitchen remodeling will have a major impact on the costs and timelines. During the planning stage, it is important to consider how much deconstruction and/or hauling will be required, as well as what kind of plumbing changes may be needed. For example, moving a sink or stove from one location to another will often involve rerouting of water and drain lines. Depending on the extent of the plumbing changes, this can add significant cost to your kitchen remodeling project.

A good time to discuss plumbing needs with your general contractor or designer is during the initial consultations. Having these professionals looped in early on can provide you with better rates for materials and ensure that your ideas are within the realm of possibility.

For example, installing a new sink will likely require changing out old plumbing pipes, which can add substantial expense to your kitchen remodeling project. Replacing or adding dishwashers and refrigerators will require rerouting of water and drain lines as well, and can add to the overall cost of your project.

In addition, you will want to know whether or not you will be purchasing a custom sink, which can increase your project cost. A sink is an item that is used frequently, so it’s worth taking the extra time to find a sink that will hold up well under frequent use.

Installation

When you’re tired of tripping over the peeling linoleum and struggling to find space for your growing family, it might be time to remodel your kitchen. A remodeling project will not only update your home’s aesthetic, but it can also increase its value and functionality. If you’re ready to take the plunge, here are a few things you should know before getting started.

The first step in a kitchen remodeling project is demolition, which can be noisy and messy. You’ll need to pack up all of your food, and you may want to eat out more frequently during the process. It’s also a good idea to set up a temporary kitchen, such as a camp stove and a microwave.

Next comes the construction phase, which can be expensive and time-consuming. If you’re doing a full gut renovation, the crew will likely need to drop walls, move gas lines, and reroute plumbing pipes. This will require a permit, and it’s important to hire a professional. Even a minor mistake can cost you dearly in the long run.

After the construction is complete, you’ll need to get your appliances and kitchen fixtures installed. If you’re working with a GC, they will handle this for you. Otherwise, you’ll need to contact a reputable plumber and electrician to install these items. This is an excellent opportunity to replace old galvanized pipes with modern PEX, for instance.

Once the plumbing and electrical are up to code, you can finish the kitchen. The drywall will be installed, and cabinets will be installed as well. Once the cabinet installation is finished, you can begin installing other finishes, such as countertops and backsplash tile.

If you have sufficient home equity, a HELOC is an excellent option for financing a kitchen remodel. These loans are based on your home’s equity and typically offer low interest rates. They’re also a great way to avoid overspending during the remodel.

Kitchen remodels are both complex and costly. A remodeling contractor can help you create a timeline and budget that will work for your home. The best way to keep your project on budget is to prioritize what needs to be done and make sure you don’t go overboard on extra add-ons for style.

How to Properly Clean Your Carpets

Carpet Cleaning Lehi is a necessary part of maintaining your home’s overall cleanliness. It removes embedded dirt, dust, pet dander and allergens and improves the air quality in your home, which can help prevent respiratory problems and allergies.

Professional cleaners use a variety of methods to deep clean wall-to-wall carpeting. Choosing the right one for your needs depends on the type of carpet, its condition and what sort of furniture you have in the room.

There are many ways to clean carpets, each with its pros and cons. The methods are often divided into two categories — dry cleaning and wet cleaning. Dry cleaning uses no water in the process, while wet cleaning involves using a cleaning solution that is applied to your carpets and then rinsed with special equipment.

The shampoo cleaning method is great for removing oil-based stains. It is a low-moisture cleaning method that also works well for a quick refresh between extraction cleanings. This is ideal for busy homes and commercial spaces that need to be put back into use quickly.

Before beginning the shampoo cleaning process, the technician evalutates your carpet to see what type of fiber it is made from and what kind of soiling is present. This helps determine the best course of action for your carpet. Next, the technician preps the area to be cleaned by moving furniture and pinning drapes up to prevent them from getting wet.

After prepping the area, the shampoo is applied with a rotary machine and allowed to soak in for a short time. Then, the carpet is rinsed with a heated rinsing solution. This helps to loosen and dissolve the dirt from your carpet fibers, which is then sucked away by the vacuuming equipment.

A final vacuuming may be required to suck up any remaining dirt particles from the carpet. This is an excellent choice for preventing the buildup of moisture and mold in your carpets. It is especially effective for jute and coir carpets that can suffer from fiber damage, color loss and shrinkage if exposed to liquid.

Cleaning Products

Carpet cleaning products are used to help eliminate tough stains and deodorize the fibers of the carpet. There are several different types of carpet cleaners available on the market, including hot water extraction machines and dry-cleaning systems. Regular vacuuming is also an important part of maintaining clean and healthy carpets.

The most common carpet cleaning products are detergent based. These solutions work through a chemical mixture to break down and dissolve dirt, oil, and other substances. They can be used in conjunction with hot or cold water and are often combined with a brush or other tool to help loosen the dirt and debris in the carpet before it is suctioned away.

There are also several different specialized cleaners for more specific needs. For example, there are stain removers for organic stains, such as wine or coffee, and odor eliminators that are perfect for pet owners. Some of these cleaners even use enzymes to break down and deodorize odors at the source, rather than masking them with perfumes and chemicals.

Lastly, there are a variety of carpet extractors designed to tackle the deepest dirt and grime in high traffic areas. These solutions can be used in conjunction with a powerful heated or non-heated vacuum machine to provide an intense clean that will revitalize the carpet and leave it looking like new.

All of these cleaning products must be carefully selected to ensure they are safe for the environment and human users, as well as effective at removing stubborn stains. It is also important to consider how much money each one will cost, as this can often be the determining factor for many customers. In addition to price, customers should look for a balance between the size, concentration, and performance of each product in order to find the best fit for their needs.

Preparation

It is a good idea to remove breakable items from the area that will be cleaned. This includes tables and cabinets with glass tops, fine china or porcelain, electronics, and anything else that could easily get scratched or broken. It is also a good idea to put away valuables such as jewelry and cash, which may be vulnerable to theft. It is generally best to keep pets and children out of the cleaning area as well. They may disturb the process and be a distraction.

It is recommended that you vacuum the carpeted areas before having them cleaned, especially if there are stains or pet odors. This will help loosen up dirt particles and make the job go more quickly and smoothly. Vacuuming will also prevent dirt from settling in the fibers of the carpet and causing spots when it dries.

If you have a carpet stain from oil-based paint, you can try to remove it before the cleaner arrives by blotting with paper towels until the liquid is dry. If the stain persists, you can try to remove it with rubbing alcohol or even paint thinner. Be sure to test the solution on a small section of your carpet before using it.

If you are having your carpets bonnet cleaned, it is important that you empty all of the furniture from the room and remove any large pieces of movable furniture. You should also prepare for the time that it will take for the carpet to dry. It is a good idea to open windows and use fans during this time to help it dry faster. You can also put wood blocks or aluminum foil squares under and around heavy furniture legs to protect them from rust or stains that may be transferred to the damp floor.

Cleaning Process

Professionals have access to heavy-duty equipment you may not be able to rent at your local hardware store, including UV lights for spotting pet stains and the powerful machinery required for hot-water extraction cleaning. Also known as steam cleaning, this process involves saturating carpet with very hot water (often 200deg or higher), which loosens dirt and other ground-in residue that ordinary vacuuming can’t reach. It’s also effective at removing odors and killing bacteria, which can help people with allergies.

Before the carpet cleaners arrive, they’ll walk through the rooms in which they’ll be working to get a feel for how much dirt is trapped beneath each area’s surface. Next, a pretreatment designed specifically for your carpet is applied wall to wall and agitated with either a hand or power brush. This loosens soil that has become bonded to the fibers, making it easier to remove during the cleaning process.

Then, the carpet is shampooed with a special detergent, just like you would wash your hair. It’s then rinsed with clean water, and the cleaned carpet is vacuumed to suck up the remaining soapy residue. Shampoo cleaning, which is sometimes confused with encapsulation cleaning, was widely used until it was superseded by hot-water extraction methods in the 1970s.

As with other cleaning methods that use water, steam cleaning can leave behind moisture that encourages the growth of mildew and mold. To minimize the risk of these problems, it’s important for the carpet to dry quickly after cleaning. This can be accomplished by using fans and limiting traffic on the carpet while it’s drying. It’s also a good idea to vacuum frequently, ideally several times per week, and to use doormats at each entrance to your home to help prevent dirt from becoming deeply lodged in your carpet in the first place.

Post-Cleaning Care

Our tried and true hot water extraction method is the best way to thoroughly clean carpet, removing dirt, allergens, cleaning solution and the majority of the moisture. This leaves your carpets soft, fresh and hygienic.

Keep people and pets off the newly cleaned carpet until it is completely dry. Walking on damp carpet flattens the pile, increases drying time and may leave permanent marks. If a pet soils the carpet, immediately wash it with a clean spotter (such as an old white towel) to avoid color transfer and staining.

If you need to move furniture back into place, wait until the carpet is dry. Moving furniture before the carpet is completely dry can dent or transfer stains from furniture finishes.

Vacuum carpeting regularly after cleaning. This removes loose dirt particles and prevents resoiling. We recommend a vacuuming regimen of at least once per week, and more often for high-traffic areas.

Always use a carpet cleaner recommended and certified by the Carpet and Rug Institute (CRI). Pretest any cleaner in an inconspicuous area to ensure that it doesn’t cause any color or texture change to your carpets.

A carpet that is regularly maintained will last longer and look better. A regular maintenance routine includes regular professional cleaning, rotating furniture to reduce the amount of wear in one spot and implementing a “no shoes in the house” policy to minimize tracking in dirt. By following these tips, your carpets will look and smell great year-round. For more information about caring for your carpet, contact a CRI-certified carpet cleaning specialist. They will provide the cleaning methods that are appropriate for your carpet and answer any questions you might have.

Navigation